Flashy Resurrection of a Soft-Bricked BIOS
I unbricked my BIOS after Death By Secure Boot by reflashing it with an external programmer. Here are WAY too many details about that experience which was both new, and exciting to the geek in me.
Where I Started
After reading up on Secure Boot, I believed that "bricking" a machine with Secure Boot meant that the operating system would not start up and I could still access the BIOS, disable Secure Boot, and recover. I never dreamt that my BIOS would stop loading my graphics card on boot. Shielded by my ignorance, I experimented with a risky flag called --yes-this-might-brick-my-machine (with a literal short form --yolo), and soft-bricked my motherboard as a result. I documented it all here if you'd like more specifics.
Stuck, I was. I needed video to use the BIOS to enable video. My direction was unclear, but hope remained.
Normally the way to reset BIOS settings is to use the jumper pins. A second way is remove power, the CMOS battery, and press the power button to discharge anything left over. I attempted both of these with no success. Secure Boot platform keys and settings are stored in the NVRAM so defaulting all the BIOS settings is not enough. Security wise, this does make sense as it stops a bad-actor with hardware access from circumventing Secure Boot.
I wanted to make sure there wasn't an obvious hardware failure masked by my hubris. I removed all of my PCI cards, removed all but one stick of RAM, and I alternated the RAM sticks to see if there was a change in behaviour. The system continued booting, starting the fans, and lighting up my keyboard throughout all the hardware changes. The caps-lock my only indication of life, I left it with the RX 560 and a single stick of 16G of RAM. Less hardware meant less risk, and a smaller problem-space to troubleshoot.
Sitting with this for a while I was left with limited options. I could have replaced the motherboard or taken it to a computer repair shop, but I chose the more interesting path. After a bit of research on the feasibility of externally flashing the BIOS, I decided that was the way to go. It also opened the door to something in hardware I've never done and rests outside of my comfort zone. I'm all about personal growth and one must stretch ones limits when opportunity presents itself. Never have I ever flashed a single component in a larger hardware system in-situe, especially on a motherboard. Despite the risk of burning out my motherboard, my intrigue outpaced my apprehension.
Preparation
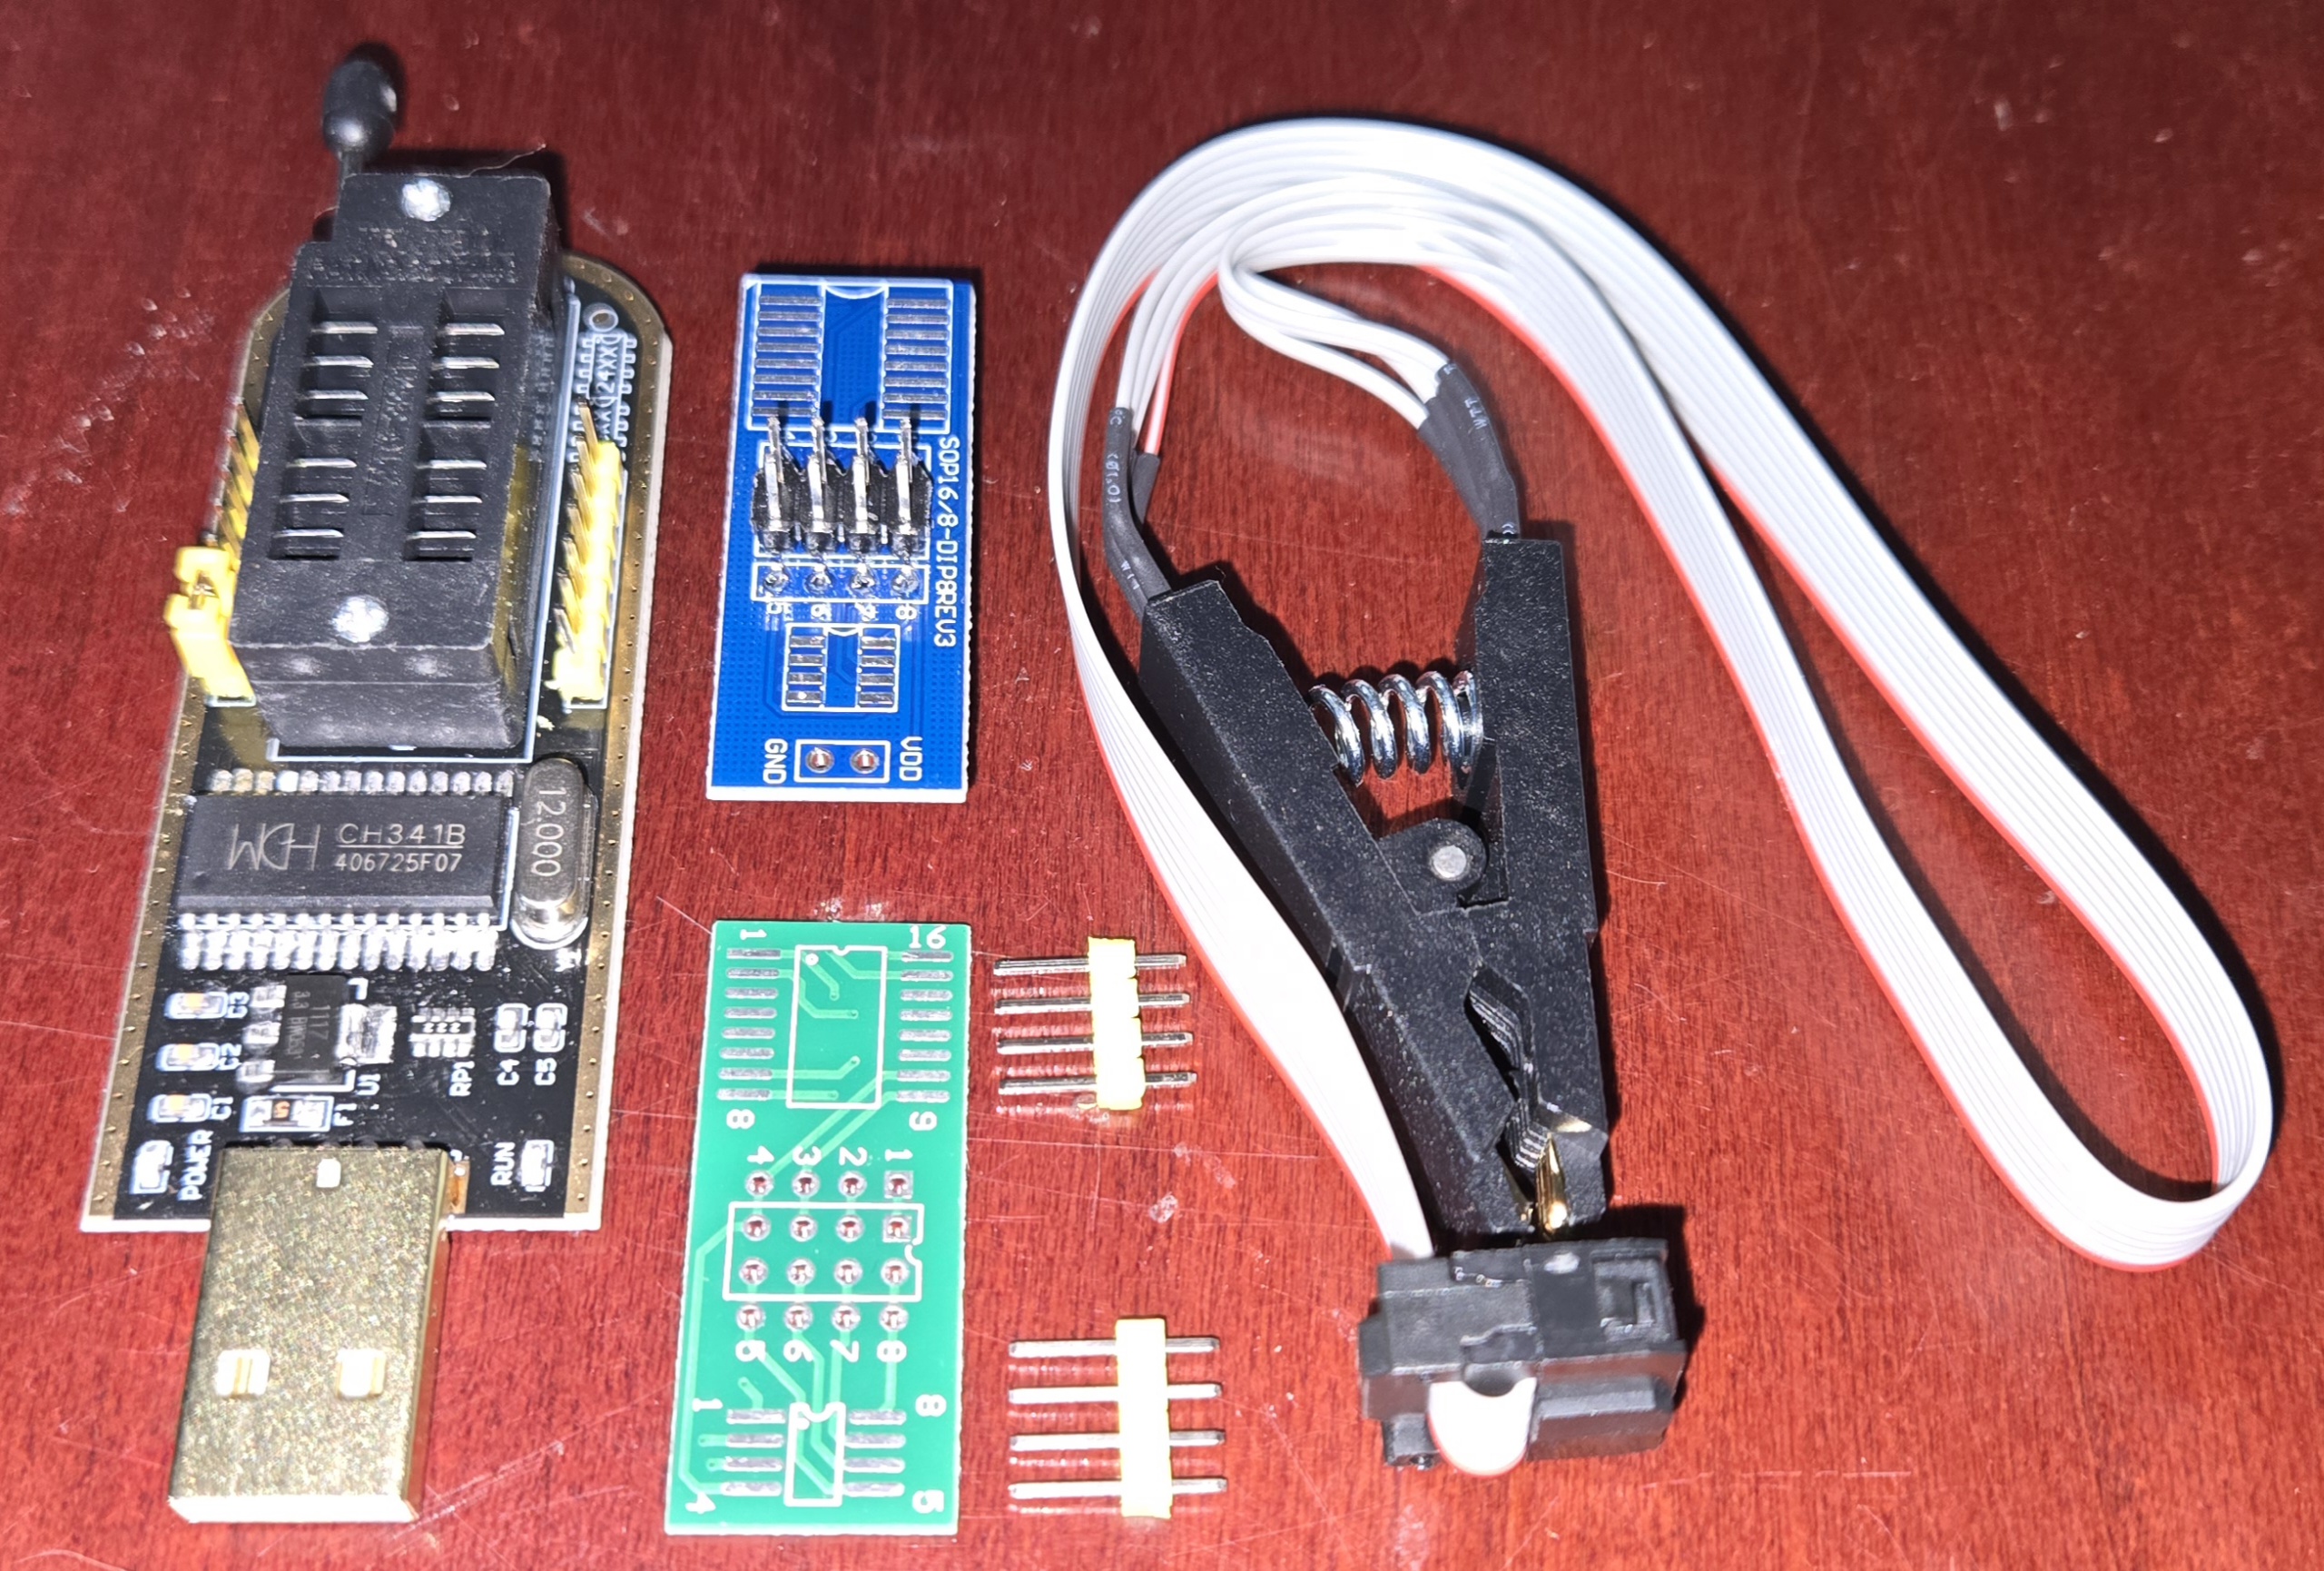
BIOS flashing can be done using a CH341A programmer with an SPI interface which are an order of magnitude cheaper than a new motherboard. There are less expensive CH341A programmers variants available and there is a well known concern where some of these variants provide a 5V data line when they SHOULD only provide 3.3V. This runs the risk of burning out whatever they're programming depending on the specs. I even found tutorials from solder-happy hardware geeks showing how to modify their CH341As to force them to work at 3.3V instead. I acquired one but was in the dark about whether it was "safe" or not.
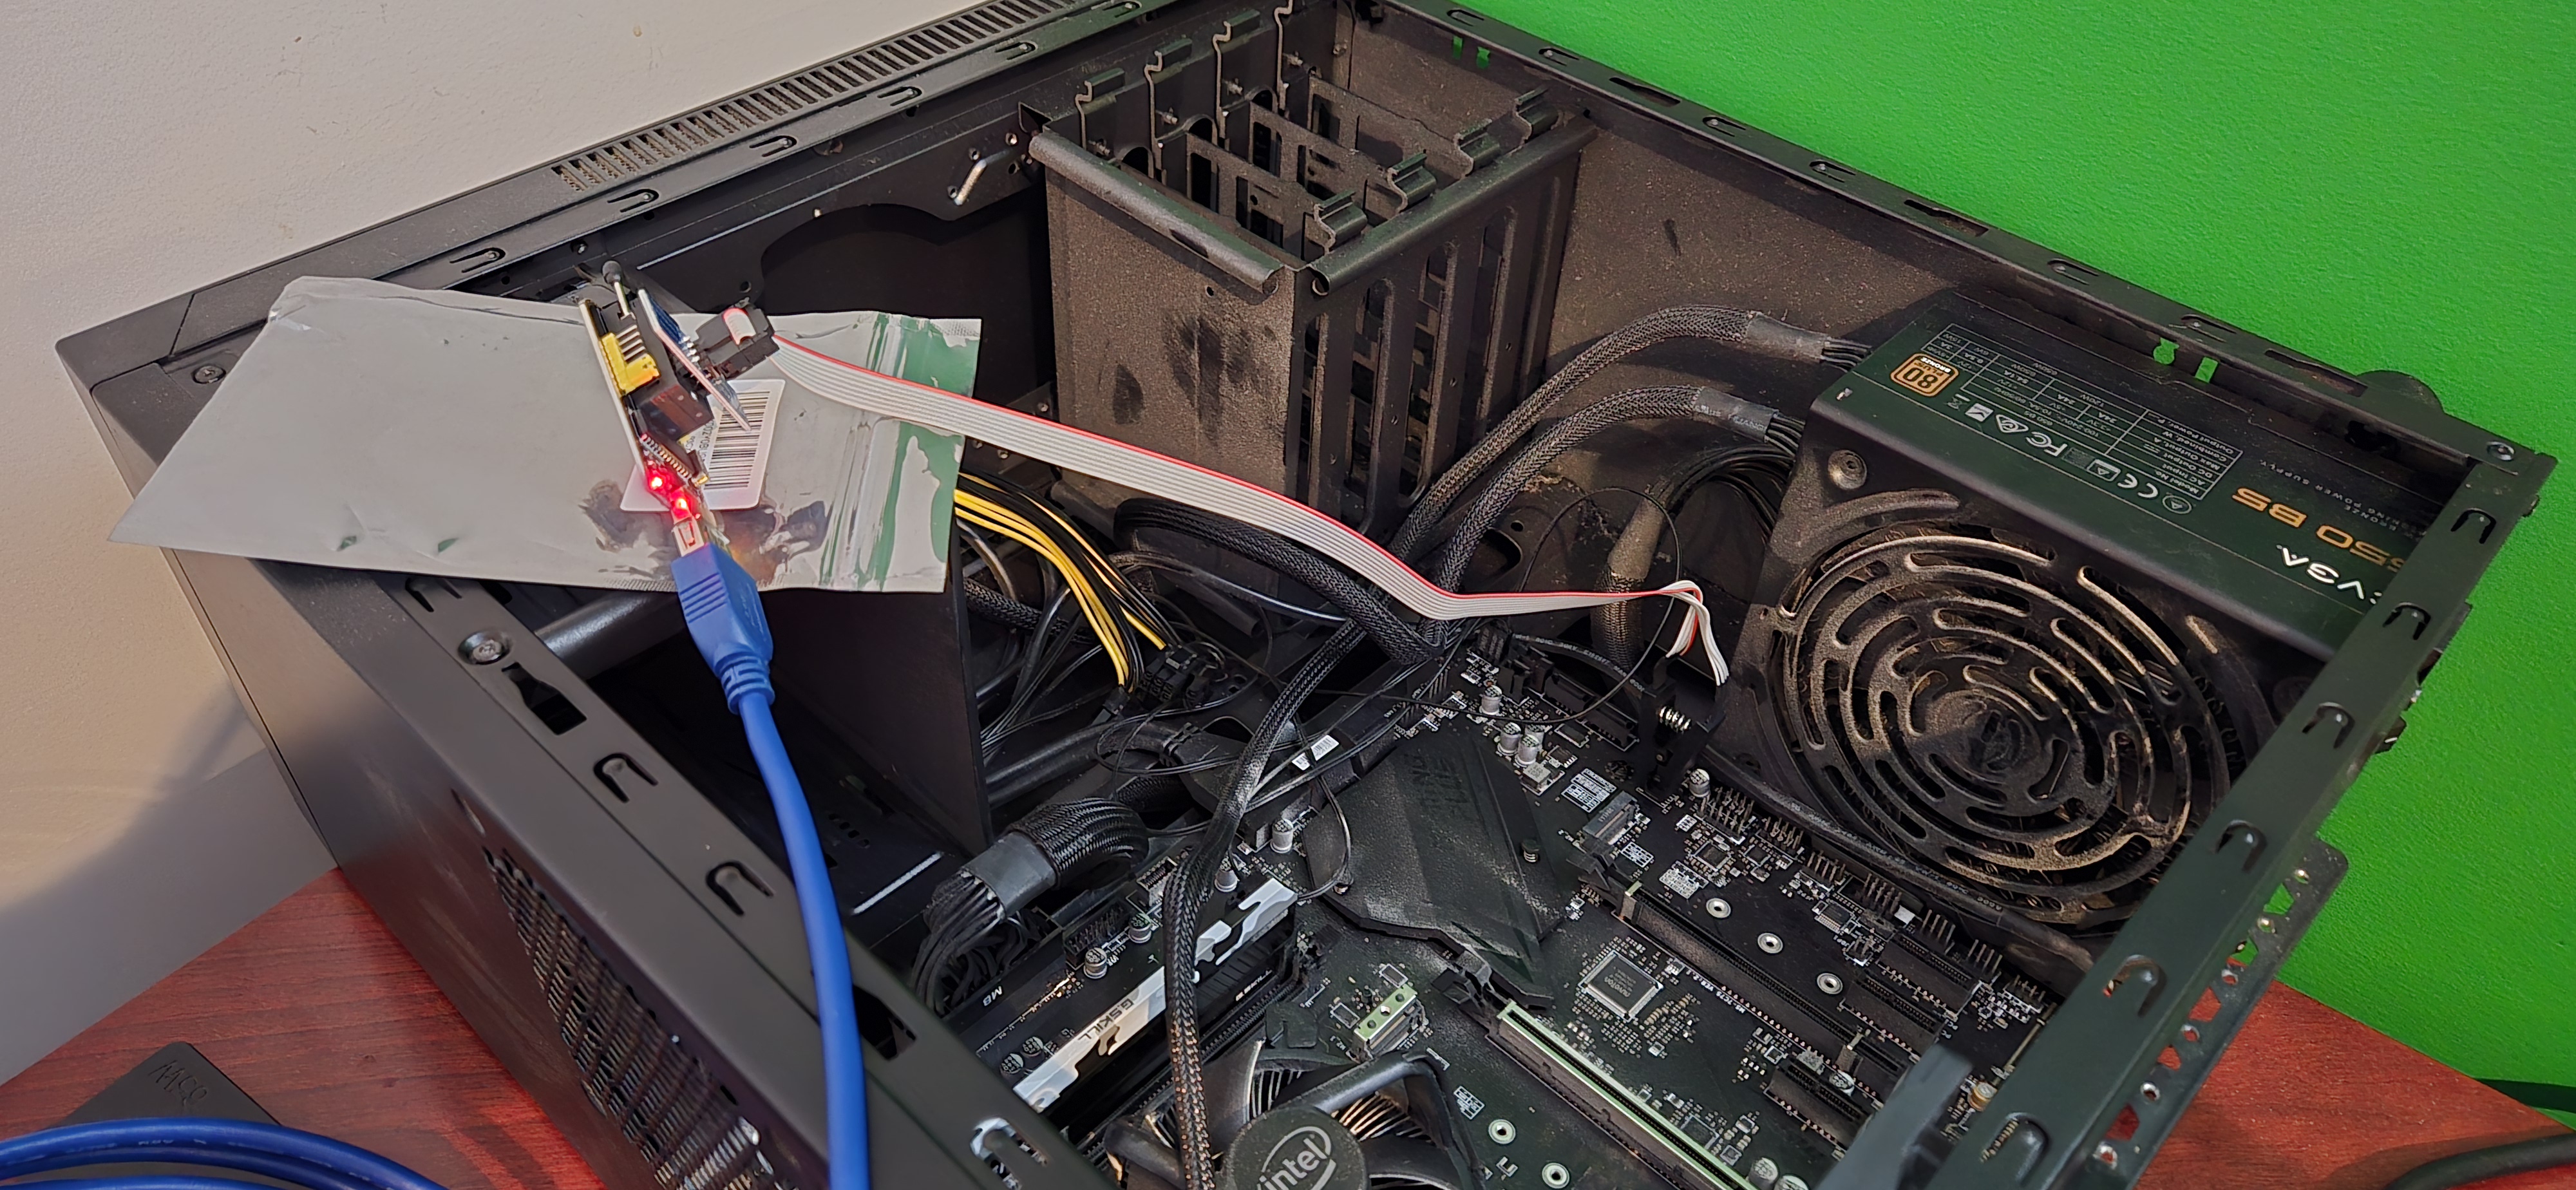
The gold standard for driving the programmer in Linux seems to be flashrom which allows one to read and write certain types of Integrated Circuits (ICs) which are those literal tiny black boxes on motherboards and other circuit boards. In this case, the CH341A programmer comes with special alligator clip attached to a ribbon cable. The clip has teeth which connect to the BIOS's legs, and the other side connects to the programmer using a cute clamping interface.
Identifying the Parts
My motherboard manual doesn't label the BIOS. I looked up images of what they should look like, then found it visually. I read the text off the chip and verified that I was correct.
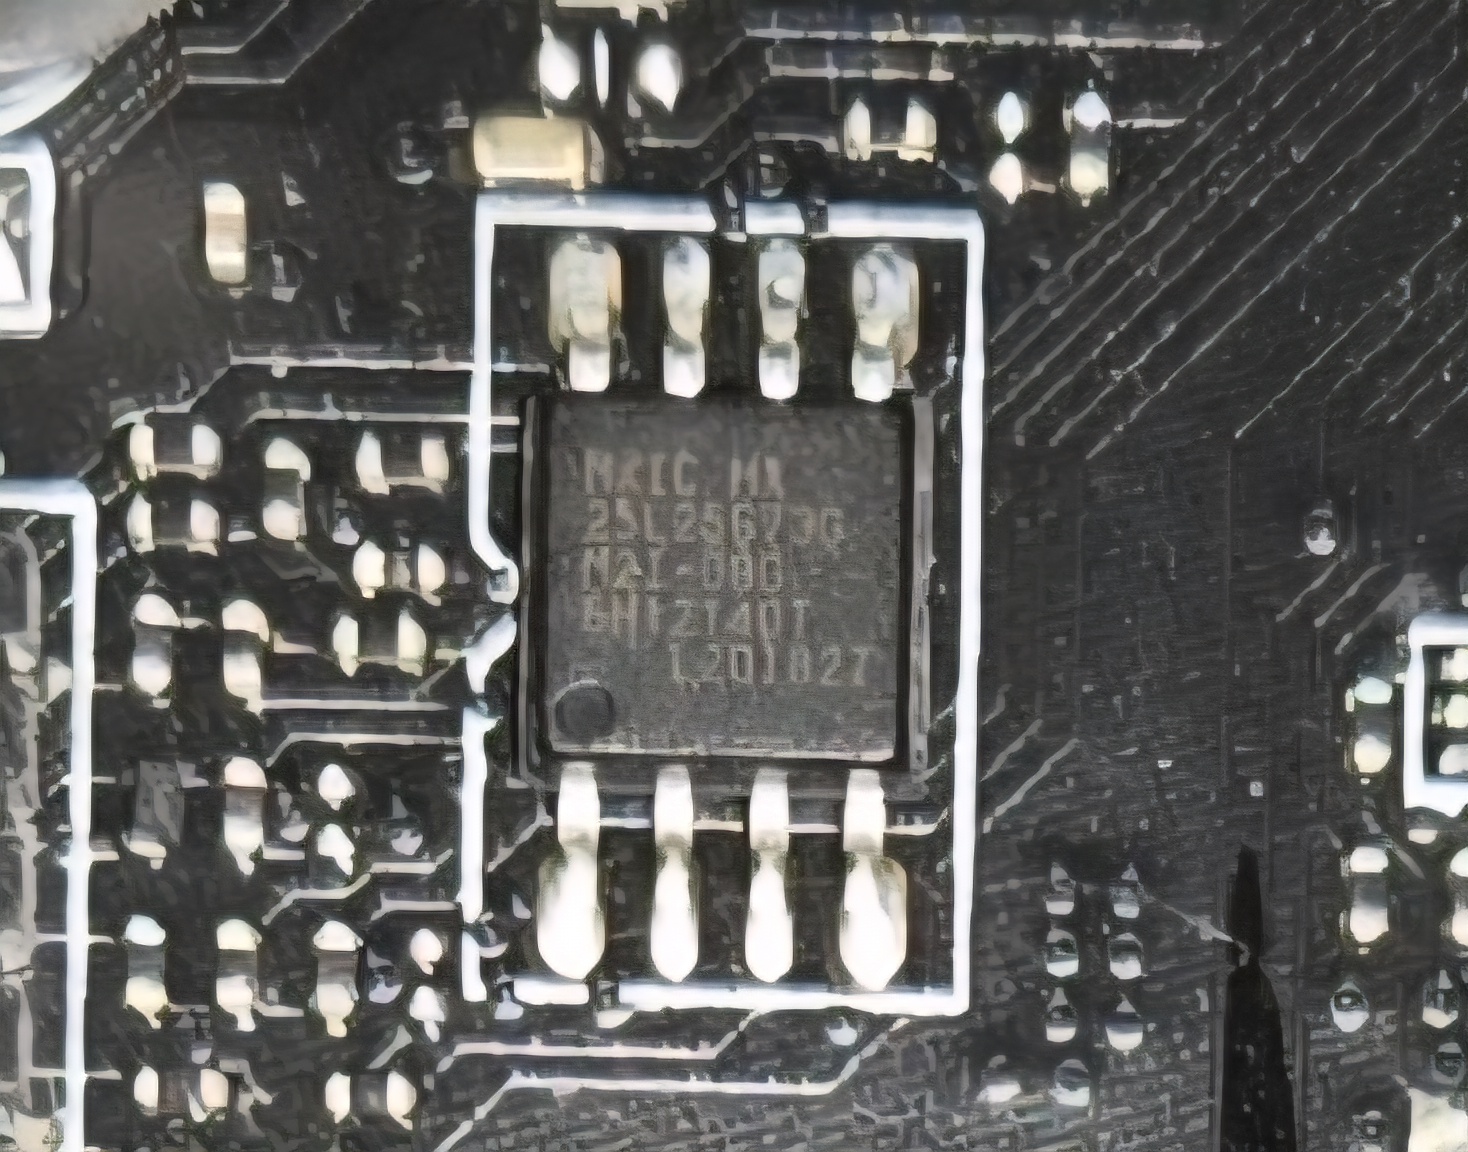
Using the label, I looked up the BIOS specs and under 12. ELECTRICAL SPECIFICATIONS the "VCC to Ground Potential" is -0.5V to 4V. This means if my programmer does over-volt the device with a 5V data line, there's a reasonable chance it never wakes back up. Safety meant that I needed to test the programmer before I used it.
My multimeter was packed in a box in a warehouse somewhere due to construction in my basement so I borrowed one from a friend. When plugged into my laptop, only 3.3V came off the CH341A's power and data lines.
From what I could tell, this process should be safe... as safe as clipping onto electrical components on a motherboard can be at least.
The Plan
So I wrote my detailed plan, and followed it. Yes, I use markdown lists often, which works well for my markdown-driven website. The actual plan I went with is here:
- Validate Programmer
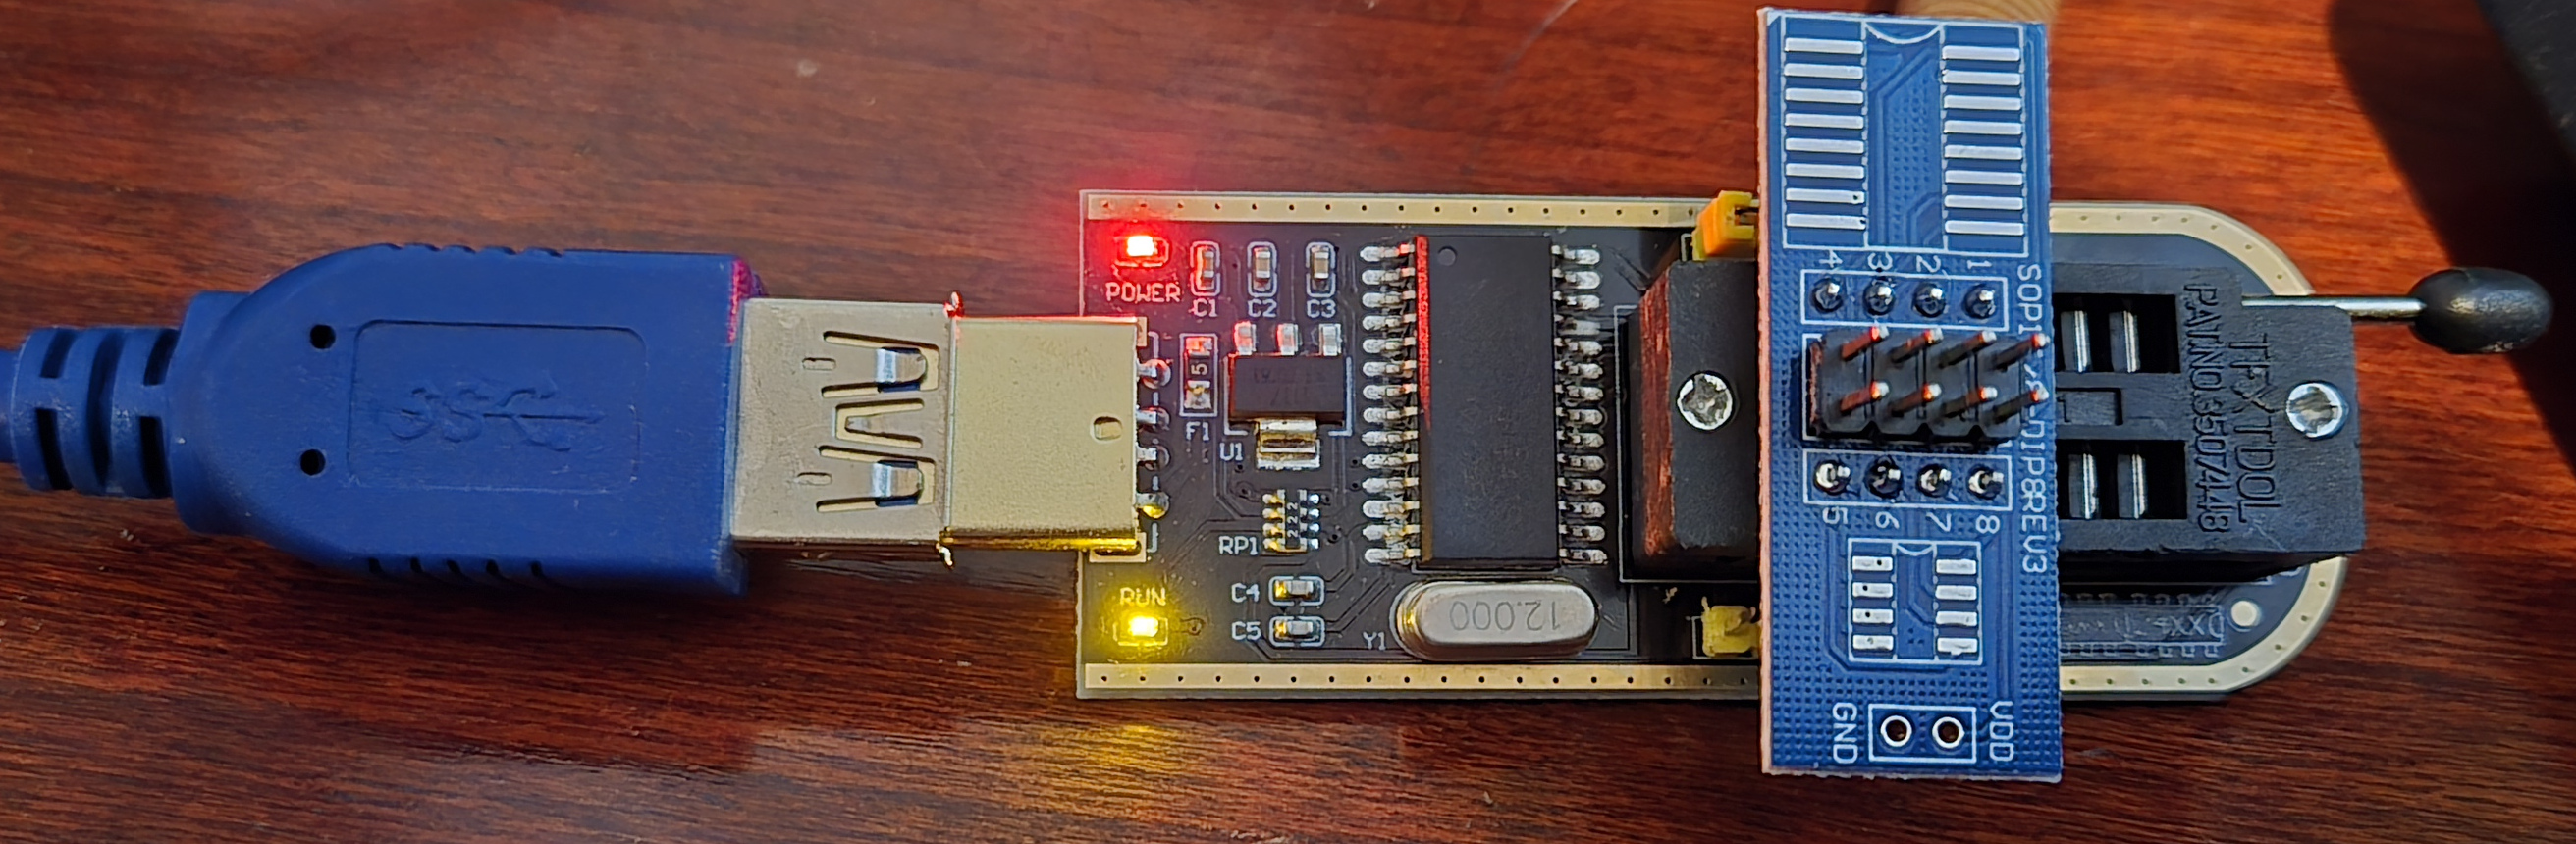
- Plug in the adapter board
- Validate that VCC provides 3.3V with a multimeter
- Unpower motherboard
- Power Cable
- CMOS battery
- Press power button for 10 seconds
- Validate BIOS VCC pad is 0V
- Connect Programmer
- Attach Clip on to the BIOS, connect to programmer
- Plug programmer into Proxima
- Validate that
flashromcan see the chip- (CHECK)
flashrom -p ch341a_spi -V
- (CHECK)
- Backup and Validate Connection
- Read Original BIOS Contents
- Read failures just give wrong bits
- Do this multiple times, validate with checksums between them
for x in 1 2 3; do flashrom -p ch341a_spi -r pre-write-dump${x}.bin -V 2>&1 | tee pre-write-dump${x}.logsha256sum pre-write-dump*.bin- Expect these are all the same
- Read Original BIOS Contents
- Write and verify
- Write new BIOS from MSI site
flashrom -V -p ch341a_spi -w E7C75IMS.AF1 2>&1 | tee write.log
- Read the BIOS from MSI site and validate checksums
flashrom -V -p ch341a_spi -r post-write-dump.bin 2>&1 | tee post-write-dump.logsha256sum *.AF1 post-write-dump.bin
- Unplug Clip
- Write new BIOS from MSI site
- Power Motherboard
- CMOS battery
- Power Cable
- Attempt Boot
How It Went
I had a bit of trouble orienting the programmer which uses a SOC8/16 adapter. Aligning pin 1 is tricky when you haven't fully accepted that your age has rendered your eyesight a little less precise.
The very first time I clipped onto the BIOS, it could not be detected. I unclipped it and reclipped it a little more carefully and this time flashrom found the BIOS correctly.
One of the messages which gave me pause was the following (copied, but newlines not maintained):
Found Macronix flash chip "MX25L25635F/MX25L25645G" (32768 kB, SPI). This chip may contain one-time programmable memory. flashrom cannot read and may never be able to write it, hence it may not be able to completely clone the contents of this chip (see man page for details).
One-time programmable memory sounds like something which would kibosh the entire external flashing process. Fortunately only parts of the chip are one-time programmable which includes serial numbers and such set by the manufacturer. These parts would not be change during a normal BIOS flashing so I concluded the message was harmless.
Everything else went exactly to plan. The checksums all matched after the first round of reading, and writing worked the first time as well. Each read took about 5 minutes, and the writing was similar, so overall the process was half an hour or so.
I disconnected the clip, replaced the CMOS battery, and the graphics card and attempted a boot.
It worked, I cheered, and the shame of having bricked the machine was replaced with the relief of having successfully restored it. I took a breath, then shut it all down to put the rest of the hardware back in.
All in all, the process was not bad. It felt unusual to connect something to a component on the motherboard directly using ostensibly a fancy chip clip, but the rest felt similar to working with DIY hobby boards. I'm glad I went this route.
Next Steps
Now that I know I can recover, I'll take another look at how I use Secure Boot and see if I can avoid --yolo. I'm excited for the VFIO Desktop setup which drove me to this point, so I hope to work on that soon.
References
- This Tutorial was also very useful in setting up the programmer.
- BIOS (MX25L25645G) Specs